Sunday, November 28, 2010
Rear seal
The rear seal is installed. This a later conversion type that converts the old rope seal to a spring loaded neoprene type. This should effectively stop a lot of the old British car leaking all over the garage floor problem. Well, it won't stop it all, it is British after all but the rear main is one of the larger culprits. In the second shot, you can see one of the notorious locktabs. It is not yet bent over. I am not going to torque everything up until the missing three arrive.
I weighed the old and new flywheels. The old one weighs 28.8 lbs. The new weighs 13.6 lbs. There must be a way that this can be calculated into increased performance but I don't know what it is. The manufacturer says that it is good for 15 horsepower. Let's say it's in fact 10. 160 +10 +maybe 10 for the 9 :1 pistons so far should yield about 180. The real increase in hp happens in the head work. Stay tuned.
The forward side of the flywheel is shown in the last two shots and shows holes that were drilled to balance the flywheel. I was trial-fitting the flywheel to the crank and noticed that it needs to go visit the machinist again as the dowels that locate the flywheel to the crank need to be recessed to clear the flat rear locktab. The dowels are shaped sort of like the head of a nail and the top has to be in the same plane as the flywheel. One step forward...
Thursday, November 25, 2010
Piston install
All of the pistons have found a home. Looks really good. Unfortunately, again they are only nipped up because of the missing locktabs. But they are all in place and setting the proper torque will take litle time once the proper parts show up.
The next shots show the front of the engine where the gear for the distributer shaft will fit. First the helical gear then the timing gear sprocket, then the oil flinger and the distributer shaft and gear. The little dirty bronze looking piece behind the crank is the timing chain spray oiler.
The three bolts sticking forward are where the oil pump attaches. I now go to order the proper parts.
Happy Thanksgiving.
Piston install
crank meets block
So the crankshaft is located into the block. The second shot shows a typical problem with any of these little projects. The main cap bolts are secured with locking tabs and 14 are required-2 for each bearing cap. Those are the shiny replacements in the second shot. As you will notice, there are only 11 in the new set. So rather than being able to finish this assembly, I can only nip the bolts up a bit rather than setting to final torque specs. The fourteen old locktabs are shown in the third shot.
No bother, I will start to install the pistons and rods. the
Crank prep
The first shot is of the rear main journal of the crankshaft. The original factory scroll has been removed and it is ready to have the replacement rear seal installed.
The next shots are of the block and the crank ready to be joined. On the last shot you will note the white grease on the bearing shells which are ready to receive the crank.
Rod and Main bearings
Pistons and rods assembled
Pistons and rods
On Wednesday, the flywheel and clutch were finished being balanced, etc. so they came home and assembly of the engine lower end starts. These start off with all the parts laid out and bearing shells installed. All the end gaps on the piston rings were checked and filed as needed to fit. Essentially almost every one needed to be filed. I enjoy this part as things are clean and reassembly is exacting but satisfying to see it all comming together.
Sunday, November 21, 2010
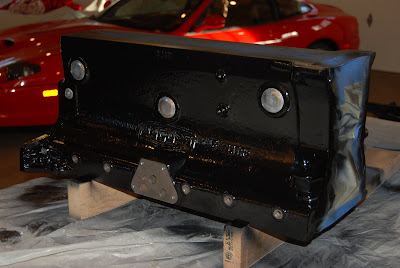
Painted block
The block got its final color today. It now needs to sit and cure for 7 days. Anyone out there have an engine stand that they are not using for the next couple of months? I hate to buy one cause it will just get in the way after this rebuild is over. Maybe I should buy one on Craigs List then resell it when I'm done.
Saturday, November 20, 2010
Prepared block
Subscribe to:
Posts (Atom)