Monday, September 19, 2011

Fairfield Concours


Dee and I went to the Fairfield County, Ct. Concours in Westport, CT. on Sunday. It was a really good show. If any of you want to view a bunch of snapshots of a bunch of really fine cars, you can see them on the web album- Dee Welding photos 2011-8-18-Fairfield Concours. This is the first time I've tried this so let me know if it doesn't work.

Try picassaweb.google.com/102163592810391998508/20110918fairfieldconcours
Posted by Picasa

Wednesday, September 14, 2011

Horns Finished


The wrinkle finish paint was cured in the kitchen oven and then the horns were reassembled. The passenger side horn required a bit of straightening since it was hit pretty good at one time. It is not perfect, but the horns are mounted to the inside of each of the front wheels are are generally not visible anyway. But they now work and it is more important that they be heard.

Posted by Picasa

Sunday, September 11, 2011

Radiator Paint


The first coat of the high temperature paint went on to the radiator today. Now it dries, then I will resand the top and give it another coat and this will be ready to go. Looks good.
Posted by Picasa

Horns

On the last blog entry, I posted a little about the horns. These are images of the disassembled horns. First shot is of the support bracket for the right side horn- it's pretty well destroyed from a hit that the car took to that side front that collected the front fender and horn. Second shot is of some remade pieces that will be used to reconstruct the bracket. After that are images of the horns in various states of clean up and repaint. The last two shots show the main covers still in primer. Those were painted with wrinkle finish black paint today and should come pretty close to matching the original finish. It takes a long time for that paint to dry and properly wrinkle up so I'll show that in the next entry about the horns.


Posted by Picasa

Monday, September 5, 2011

Seat Structure

Going quite a ways back, there have been a couple of posts where the metal structure for the seat was rebuilt and there was another where the seat bases and the hinge brackets were chromed. I decided to try to plug weld the chrome brackets onto the metal structure of the seat backs. I was worried about the chrome burning off where it would be exposed on the hinge brackets. Well, it worked great. Nothing even blued on the exposed chrome.

So the first couple of shots are of the completely reassembled seat backs and the last two are of the seat backs positioned with the seat bases. I need a couple of springs, some chrome Whitworth nuts and washers for the hinge bolts, and these will be ready for upholstery. A bright floral pattern I think.

Other news: A party was recently held where the two original horns were rebuilt. Amazingly, I don't think that these had been worked on before so they they weren't messed up. Party was again poorly attended but at the end of the celebration the noise makers actually made noise. They were mostly dirty and the points were fried. I filed them a little and adjusted them according to the shop manual and hooked them up to the battery of the John Deere and they worked. Now to finish cleaning and painting.


Posted by Picasa

Saturday, August 20, 2011

Plug wire tube


Here are a couple of brackets that I constructed all by myself to hold a tube to route the spark plug wires beneath the intake manifold. The early jaguars had a loom of sorts that routed the exposed wires beneath the carbs. I don't like that set up for a couple of reasons- one is that the high tension wires are right below thge S.U. carbs that aren't known for their ability to not leak, and the other is that they are just visually messy at that location. To correct this on later cars they routed the wires over the cam cover rather than down the middle of the head from the rear, and they mounted the coil in all sorts of highly visable areas. I don't like that either. This will keep the wires protected and out of view for the most part. The coil is also below the intake manifold. Spark plug wires were installed through the installed tube today. Unfortunately, I forgot to take a shot of all of this in place before I finished bagging the engine.


Other news: the headers were sent back. The original exhaust manifolds were sent to the porcelain shop. I really liked the headers except for the fact that the fit was so bad. The original type Special Equipment dual exhaust system will be used. Carbs have been sent off. I need to order spats and the gas tank soon.

Posted by Picasa

Sunday, August 7, 2011

Baggin' it


Some big news this week: the sheet metal parts have been sent off to reform school. They were just too much for me- wouldn't listen, seemed way too set in their own ways, and I just couldn't get them to follow my intentions. It is hoped that they will eventually return reformed, straightened out as necessary, and generally well-behaved. This is a strict school; one that is known for it's corporal punishment and hands on approach. Ok, ok, enough of that.


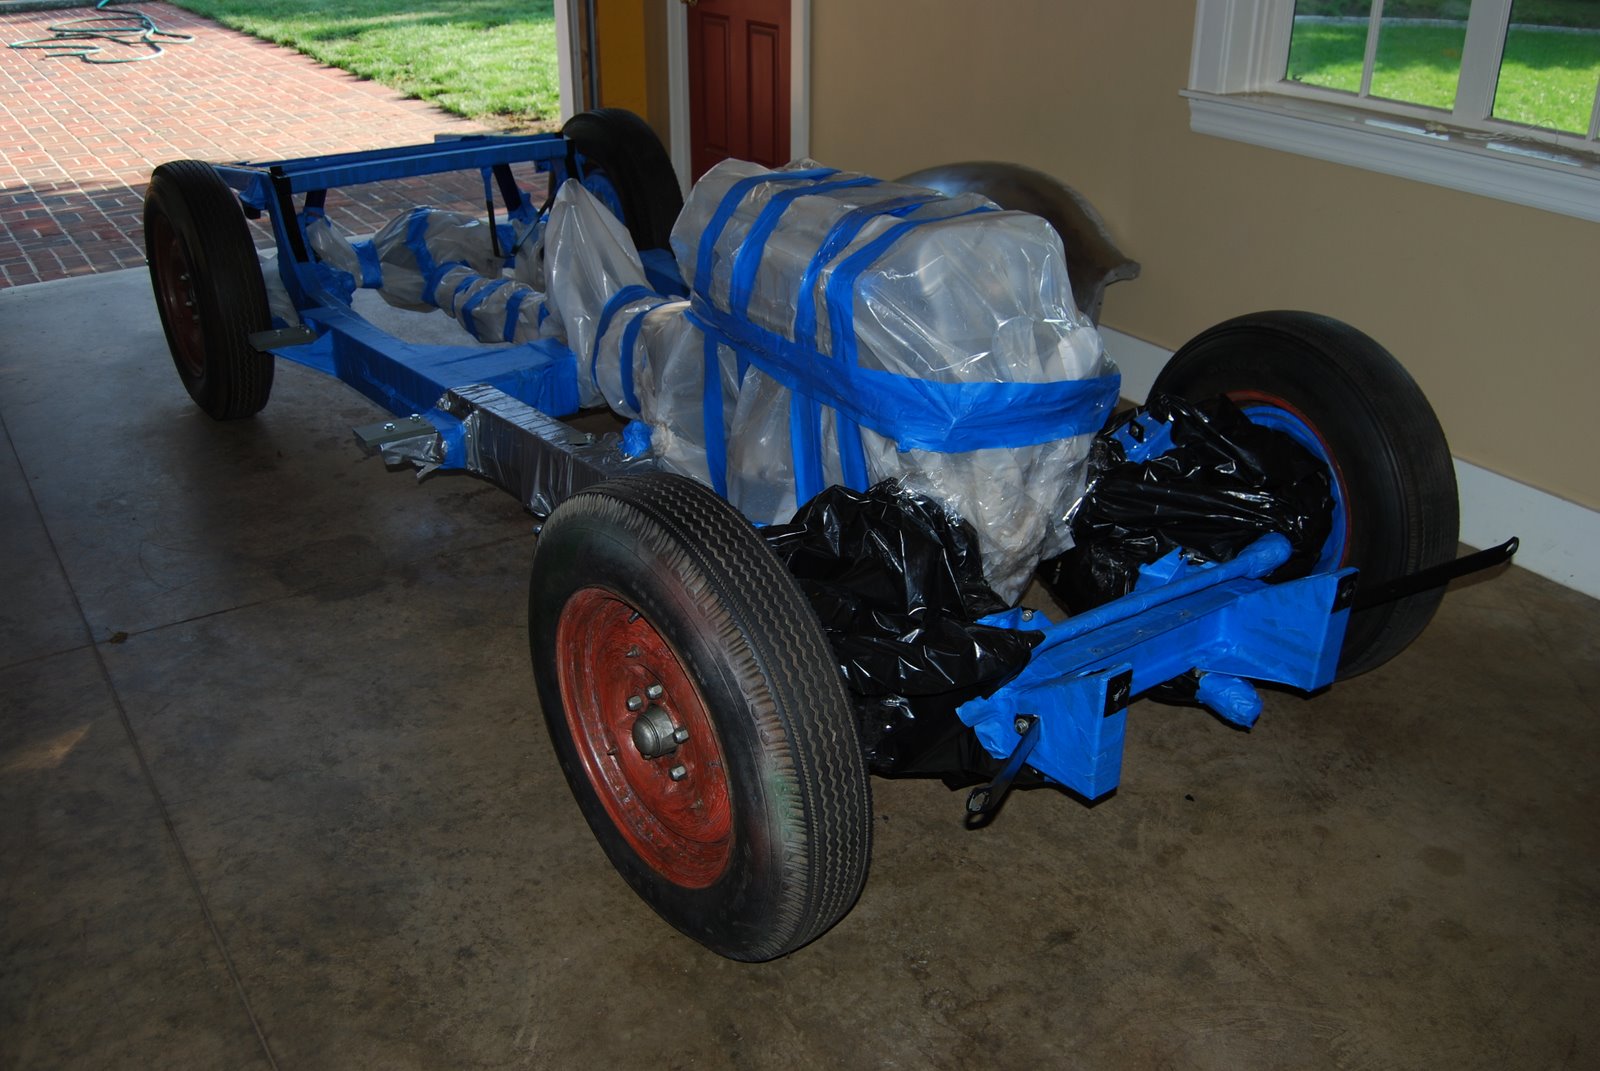
So what I am doing here is bagging and masking the frame, suspension, and eventually the engine assuming the ordered parts arrive to allow me to button it up. .

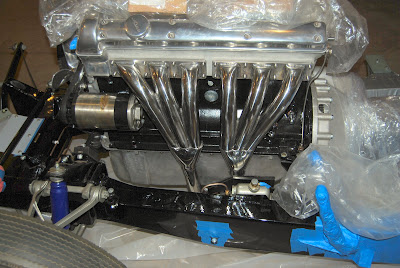
The last shot shows the stainless headers that arrived. They look great. Welding is beautiful and complete. Unfortunately, the rear header has the head flange welded a couple of degrees out of plumb and the two headers hit each other and the rear one will not clear the brake master cylinder. Curses. Also, the lead pipes are wrong. They need to have a double curve at the rear to go from beneath the frame back up to the muffler. The ones that arrived are straight.

Posted by Picasa